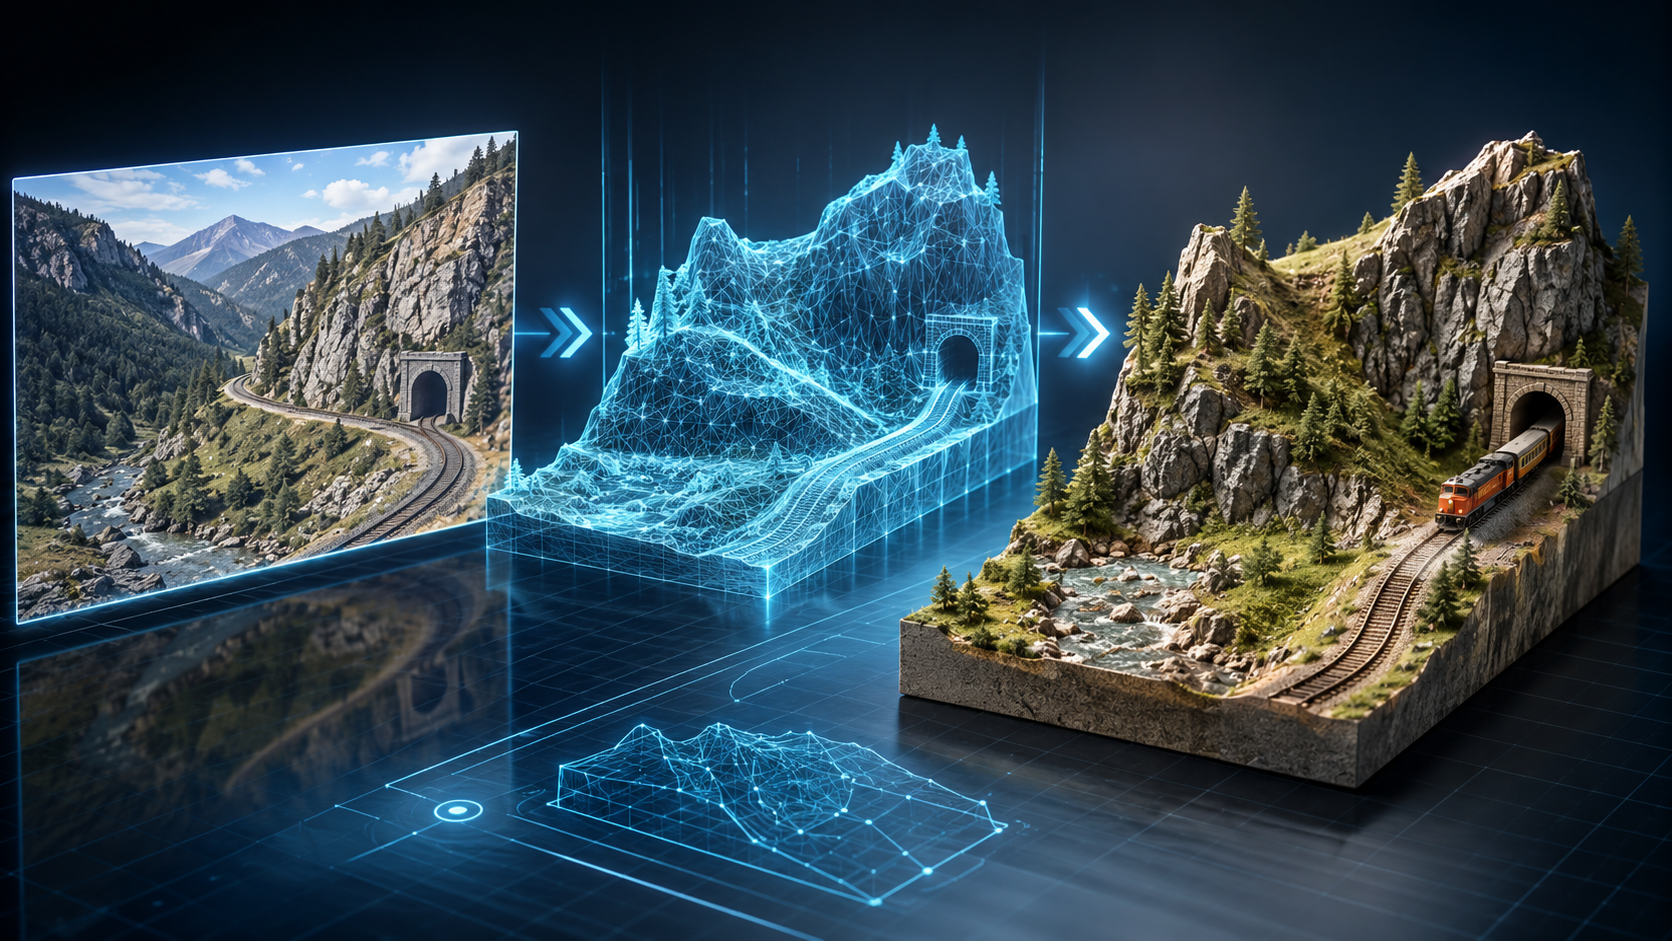
Carving terrain by hand is one of the things that quietly burns hobbyists out. You spend a weekend layering foam, plaster cloth, and putty just to finish a section the size of a paperback. The result looks great, sure, but when you do the math, you realize you'd need a full month of weekends to cover the rest of the layout.
The image-to-STL workflow changes that math completely. Take a photo of a rock you walk past on the way to work. Upload it. Get back a printable mesh. Slice, print overnight, paint the next afternoon. That's a whole terrain section done while you were doing other things.
This guide is for diorama folks, model railroaders, and architectural model makers who want to know how this actually plays out in practice. It's not a generic 3D printing post. It's the stuff I wish someone had told me when I started doing it this way, plus a FAQ at the end for the questions that come up every single time.
Why terrain is a sweet spot for AI 3D reconstruction
Most AI 3D tools are at their best when there's no anatomy to get wrong. Terrain qualifies. There's no face to mess up, no proportional accuracy required, no thin appendages that snap on the printer. A rock just needs to look like a rock, and AI is genuinely good at that now.
Scale is also forgiving. A photo of an outcrop becomes a hill at HO scale for a railroad, a boulder at miniature scale for a vignette, or a mountain ridge at urban scale for a site model. Same file, different scale slider in your slicer. You get a lot of mileage out of every conversion.
Your reference photo does most of the work
If your print comes out blobby, the problem is almost always upstream of the slicer. The photo you uploaded was the issue. After running hundreds of these conversions, here's what consistently produces good geometry:
Fill the frame with the subject. The rock, slope, or root tangle should take up most of the photo. Cropping out empty sky and surrounding clutter makes a huge difference.
Shoot in side light. Morning or late afternoon, where the shadows actually reveal texture. A flat noon photo of a rock gives you a flat noon mesh of a rock.
Skip the wet stuff. Puddles, reflective ice, wet leaves. The converter struggles when reflections lie about the surface.
Crop close to square. Wide panoramas tend to come out stretched. Square framing gives you proportioned terrain.
Background should be quiet. A rock against grass or dirt is great. A rock against a chain-link fence and a parked car is a mess.
You don't need fancy gear. Most of the photos I've used were taken with whatever phone was in my pocket. The trick is being intentional. Once you start looking, you notice good reference everywhere. A drainage ditch on the way home. A retaining wall behind the gas station. A pile of broken concrete at a construction site. Honestly, going for a walk with this workflow in mind feels different. You see textures.
Doing the conversion
Drop the photo into 3DWebGen's image-to-STL converter and let it process. You'll get an STL file back. Open it in your slicer to preview.
If the shape looks too flat, your light was probably too even. Reshoot from a different time of day, or pick a more textured subject. If it looks stretched, the framing was too wide. Crop tighter and try again. Each conversion is fast and cheap enough that iterating on the input is the right move, not trying to rescue a bad mesh in editing software.
Getting the scale right for your layout
The mesh you download has no real-world size. You set it in your slicer. Some practical numbers I keep coming back to:
Model railroad scales
For HO scale (roughly 1:87), a believable hill section runs around 80 to 150 millimeters across. For N scale (1:160), halve that. For O scale (1:48), roughly double. Honestly, the best test is to drop a piece of rolling stock next to a small test print first. Eyeballs catch wrong-scale terrain faster than rulers do.
Display dioramas
For a vignette around a single figure or vehicle, the terrain piece works out to about three times the figure's height in footprint. Bigger than that and the figure looks lost. Smaller and the base looks cramped.
Architectural site models
Site models usually want the footprint to match a real area at scale. The texture from image-to-STL is more impressionistic than topographically accurate, but for context geometry around a building, that's usually fine. Nobody is going to measure your boulders.
Giving the print a flat bottom
Almost every converted terrain mesh comes out with a slightly uneven underside, because the AI doesn't know there's supposed to be a flat plane down there. Two quick fixes:
Use your slicer's cut tool to slice a few millimeters off the bottom of the mesh. Instant flat base.
Stack a thin box or cylinder under the terrain as a modifier shape, then merge before exporting. Some slicers handle this without complaint.
A flat bottom matters for two reasons. The print sits cleanly on the layout without rocking, and you have a clean glue surface for whatever substrate you're building on, whether that's plywood, cork, or foam board.
Slicer settings that work
Terrain is forgiving in print quality, but a few choices make the result feel more believable:
0.2 mm layer height. Plenty for terrain. Fine layers waste time on geometry that's going to be painted and drybrushed anyway.
Three perimeter walls. Hides small surface irregularities. Adds rigidity.
10 to 15 percent infill. Terrain prints have a lot of internal volume that doesn't need to be filled. Light infill saves filament.
Tree supports for cliffs and overhangs. They leave less scarring on the visible surface than linear supports.
Variable layer height if your slicer supports it. Coarse layers on flat plateaus, fine layers on cliffs. Saves real time without losing visible detail.
Print in whatever color you already have loaded. Terrain almost always gets painted, so the source color doesn't matter. Light grey is convenient for previewing the geometry before paint.
Painting techniques that hide the AI tell
Once painted, terrain from image-to-STL is genuinely hard to distinguish from hand-sculpted work. A few techniques that flatter this specific output:
Dark basecoat first. Brown or grey, brushed or rattle-canned. Covers any leftover print artifacts and unifies the surface.
Drybrushing in two or three lighter shades. This is the move. AI meshes have just enough surface noise that drybrushing brings them genuinely to life. Heavy drybrushing is almost a requirement for selling the effect.
Wash for the crevices. A diluted dark wash settles into the recesses and pushes depth. Don't skip this step.
Ground cover. Static grass, scatter, foam clumps. Once you add foliage, the underlying mesh becomes invisible.
Spot gloss varnish. Dab it on wet rocks or streambed sections. The contrast between matte terrain and glossy wet spots is what makes the scene feel alive.
Where this workflow falls flat
I'll be honest about the limits, because nothing burns more than printing something only to realize the tool wasn't the right fit:
Buildings and structures. Hard geometric shapes don't survive AI reconstruction. Use CAD for buildings.
Trees and bushes. Thin branches usually disappear in the conversion. Stick with traditional model trees or scratch-built foliage.
Repeating patterns. Cobblestone, brick walls, roof shingles. AI introduces organic variation that reads wrong on engineered surfaces.
Water surfaces. Print the dry bed, then pour clear resin or epoxy for the water. Printed water never looks right.
Quick mental rule: if it's natural and roughly organic, AI image-to-STL is great. If it's man-made and engineered, use a different tool.
Building a personal terrain library
The genuine long-term advantage of this workflow is that every conversion is a reusable asset. After a few months of doing it, you have a folder of terrain pieces nobody else has, because they came from photos you took. Other hobbyists are buying from the same generic marketplaces. You're building from the actual landscape you live near, and the result feels grounded in a real place.
Organize by type. Rocks, slopes, root tangles, dirt patches, streambeds, fallen logs. When you start a new section, browse the library and mix-and-match. Total cost of the library is the cost of going outside with a phone. There isn't a better deal in the hobby right now.
FAQ
How long does a typical terrain section take to print?
A small piece (say 80 by 80 millimeters, hill-style) prints in roughly two to four hours on FDM at 0.2 mm layers. Resin prints are slower in total time but produce a cleaner surface. If you want fast iteration, FDM is the right choice. Save resin for the showcase pieces.
What's the minimum resolution photo I need?
Anything from a modern phone camera is more than enough. Resolution isn't the bottleneck. Lighting and framing matter way more. A perfectly composed 12 megapixel shot beats a sloppy 50 megapixel shot every time.
Can I generate terrain without a real-world photo?
Yes. You can describe what you want in words and use a text-to-3D tool first to generate a concept image, then convert that to STL. Two-stage workflows like this are useful when you want a fictional or stylized environment that doesn't exist in the real world. For grounded, realistic terrain though, real reference is hard to beat.
Do I need to repair the STL before printing?
Usually not. Most slicers auto-repair on import and handle the small holes and non-manifold edges that AI meshes occasionally have. If a feature comes through looking weirdly hollow, a free mesh repair tool sorts it out in a minute. I almost never need this step in practice.
How do I match the print color of stone or rock?
Don't try to. Print in any neutral color, then paint. Trying to match natural stone with filament is a losing game because real stone has variation, while filament is uniform. The drybrush technique with three or four mineral tones (dark grey base, medium grey, light buff, white highlights) gives you a believable rock face every time.
Will this work for snow, sand, or dirt scenes?
Yes for dirt and most sand scenes, since both have texture the camera can capture. Snow is harder because it's mostly white and the converter struggles to find surface variation. For snow scenes, photograph the snow with strong side light and visible footprints or branch shadows, or print untextured terrain and add modeling paste plus white scenic snow on top.
Can I combine multiple terrain prints into one section?
That's the right approach. Print several smaller pieces and assemble them on a foam or plywood base. Use a flexible filler like lightweight spackle to blend the seams. The patchwork approach lets you vary the source photos and avoid the "single repeating texture" look that pure asset-pack terrain has.
Is image-to-STL better than buying terrain from a marketplace?
Depends on what you're after. Marketplaces give you polished, tested, well-supported meshes. Image-to-STL gives you something nobody else has, derived from a place that matters to you. For the same layout I'll usually mix both. Marketplace terrain for the rare specific subject I don't have access to (like, say, a desert mesa when I live in a forest), and image-to-STL for everything I can photograph nearby.
Just try one this weekend
Find the most interesting rock or slope on your usual walking route. Photograph it cleanly, run it through 3DWebGen's image-to-STL converter, slice it, print it overnight. Paint it the next day. By Sunday evening you'll have a piece of terrain in your layout that came from a real place you can point to, and the whole process was shorter than driving to a hobby shop and back.